
 Bookmark
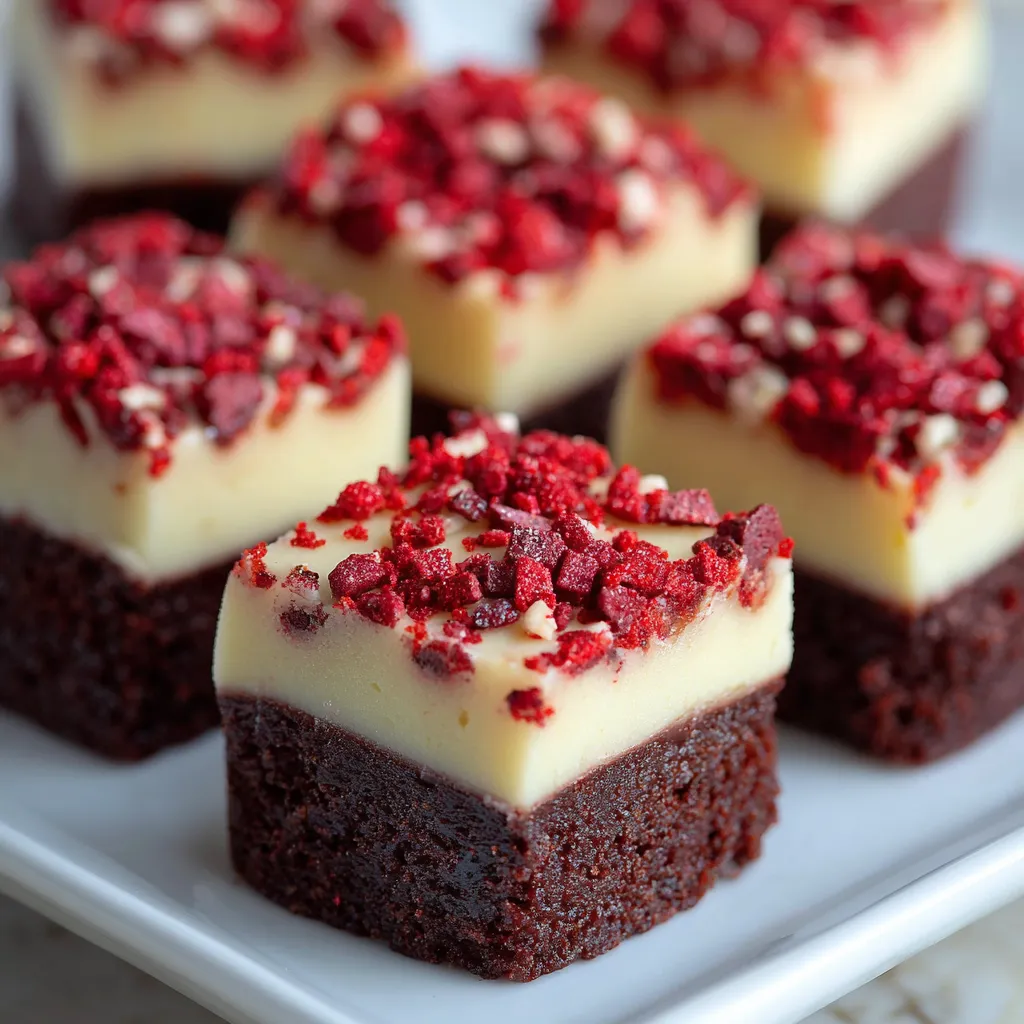
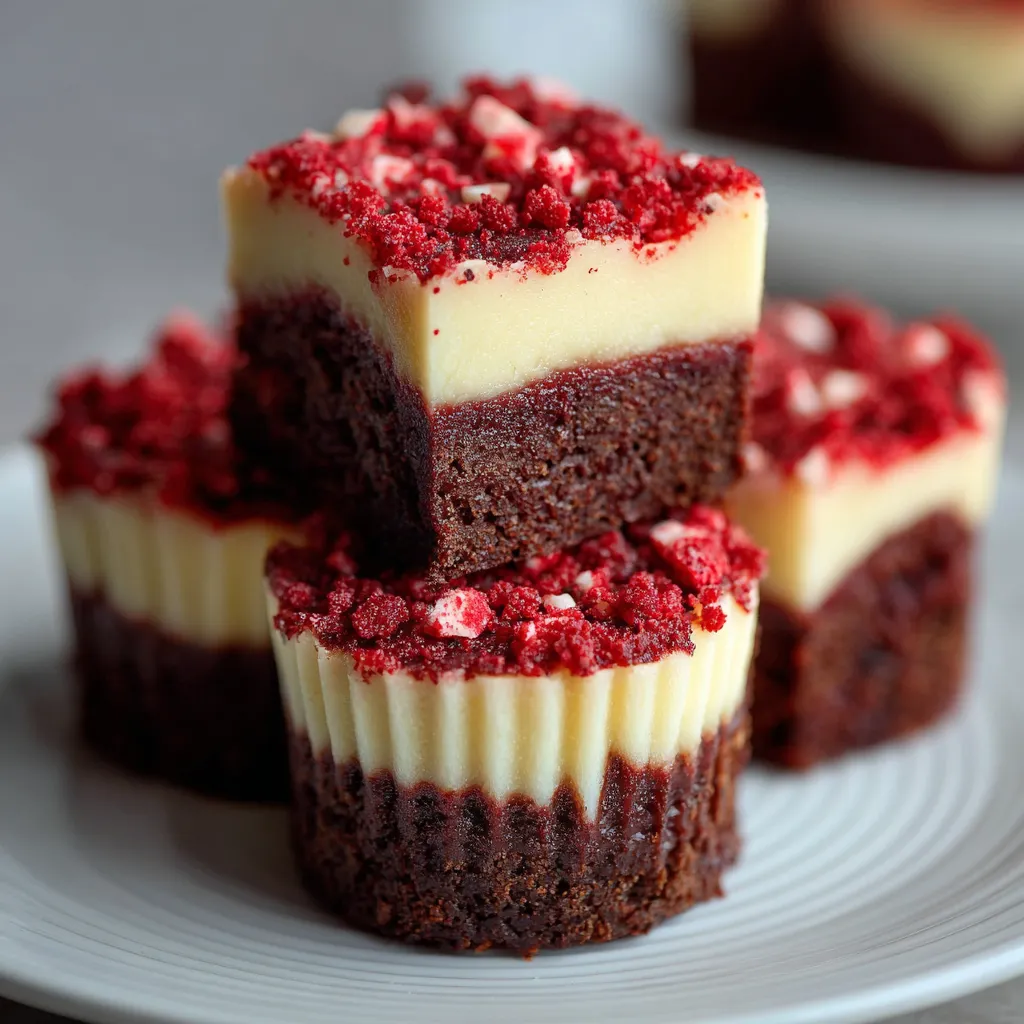
This red velvet cheesecake brownie recipe combines two beloved desserts into one indulgent treat. The fudgy, cocoa-infused red velvet base gets crowned with a creamy cheesecake layer, creating a striking marbled effect that's as beautiful as it is delicious.
I first made these brownies for a Valentine's Day party, and they've become my signature dessert. The striking red and white marbling never fails to impress guests, who always assume they're much more difficult to make than they actually are.
Ingredients
- For the Red Velvet Brownie Layer
- 1/2 cup unsalted butter melted for richness and moisture
- 1 cup granulated sugar provides the perfect sweetness level
- 1/4 cup unsweetened cocoa powder gives that classic red velvet chocolate undertone
- 1 tablespoon red food coloring creates the iconic vibrant color
- 1 teaspoon vanilla extract for depth of flavor
- 1/2 teaspoon white vinegar activates the red color and balances sweetness
- 2 large eggs for structure and binding
- 3/4 cup all purpose flour just enough for a fudgy texture
- Pinch of salt enhances all the flavors
- For the Cheesecake Layer
- 8 oz cream cheese softened for a smooth texture use full fat for best results
- 1/3 cup granulated sugar just enough sweetness without overpowering
- 1 egg yolk provides richness without making the layer too fluffy
- 1/2 teaspoon vanilla extract adds warmth and depth
Step-by-Step Instructions
- Prepare Your Pan
- Line an 8×8 inch baking pan with parchment paper, leaving some overhang for easy removal. Preheat your oven to 350°F while you prepare the batters.
- Make the Red Velvet Batter
- In a large bowl, whisk together melted butter and sugar until completely combined. Add cocoa powder and mix until smooth. Stir in the red food coloring, vanilla extract, and vinegar until the mixture is a vibrant red. Beat in the eggs one at a time, mixing well after each addition. Finally, gently fold in the flour and salt just until no dry streaks remain. Overmixing will make your brownies tough.
- Prepare the Cheesecake Layer
- In a separate bowl, beat the softened cream cheese until smooth and creamy, about 1 minute. Add the sugar and beat until well incorporated. Mix in the egg yolk and vanilla extract until just combined. The mixture should be completely smooth with no lumps.
- Assemble and Swirl
- Pour about 3/4 of the red velvet batter into your prepared pan, spreading it evenly. Carefully spoon the cheesecake mixture over the red velvet layer, trying to cover it completely. Drop the remaining red velvet batter in spoonfuls over the cheesecake layer. Use a knife or toothpick to gently swirl the two batters together, creating a marbled effect. Avoid overmixing the swirls keep them distinct for the most dramatic presentation.
- Bake to Perfection
- Place the pan in the preheated oven and bake for 25 to 30 minutes. The brownies are done when the edges are set but the center still has a slight jiggle. A toothpick inserted in the center should come out with a few moist crumbs.
The red food coloring is my secret weapon in this recipe. While some bakers try to use natural alternatives like beet powder, I find that gel food coloring gives the most vibrant red without affecting the taste. My mother was initially skeptical about the amount of food coloring, but now she requests these brownies for every family gathering.
Getting the Perfect Swirl
The key to those beautiful red and white swirls is restraint. Use a light hand when marbling the two batters together. Start by making figure eights with your knife or toothpick, then stop before the colors blend too much. The distinct contrast between the vibrant red and creamy white creates that wow factor when you cut into them. I find that chilling the red velvet layer for about 10 minutes before adding the cheesecake batter makes swirling easier, as the layers stay more distinct.
Storage Tips
These brownies actually taste better on day two after the flavors have had time to meld. Store them in an airtight container in the refrigerator for up to 5 days. For the best texture, let them come to room temperature for about 20 minutes before serving. They also freeze beautifully for up to 3 months. I like to cut them into individual squares, wrap each in plastic wrap, and place them in a freezer bag for easy dessert emergencies.
Variations to Try
While the classic version is unbeatable, there are several delicious variations worth exploring. Add mini chocolate chips to the red velvet layer for extra chocolate flavor and texture. For a festive touch during the holidays, sprinkle crushed peppermint candies on top before baking. You can also experiment with different extracts like almond or peppermint in place of the vanilla in the cheesecake layer. My family particularly loves when I add a thin layer of chocolate ganache on top after the brownies have cooled.
Common Recipe Questions
- → Can I use less food coloring in these brownies?
Absolutely! You can reduce the amount of red food coloring or substitute with natural alternatives like beet powder. The color will be less vibrant, but the flavor will remain delicious.
- → Why is vinegar used in the red velvet layer?
The small amount of vinegar reacts with the cocoa powder and helps enhance the red color while adding a subtle tang that's characteristic of traditional red velvet. It also helps activate the leavening agents for a better texture.
- → How do I know when these brownies are done baking?
Insert a toothpick into the center—it should come out with a few moist crumbs but no wet batter. The edges will be set while the center might still look slightly soft, which is perfect as they'll continue setting as they cool.
- → What's the best way to cut clean squares?
For the cleanest cuts, refrigerate the brownies for at least 2 hours after they've completely cooled. Use a sharp knife dipped in hot water and wiped clean between cuts.
- → How should I store leftover cheesecake brownies?
Store them in an airtight container in the refrigerator for up to 5 days. Let them come to room temperature for about 20 minutes before serving for the best flavor and texture.
- → Can I freeze these brownies?
Yes! These freeze beautifully for up to 3 months. Cut into squares, wrap individually in plastic wrap, then store in a freezer bag. Thaw overnight in the refrigerator before serving.