
 Bookmark
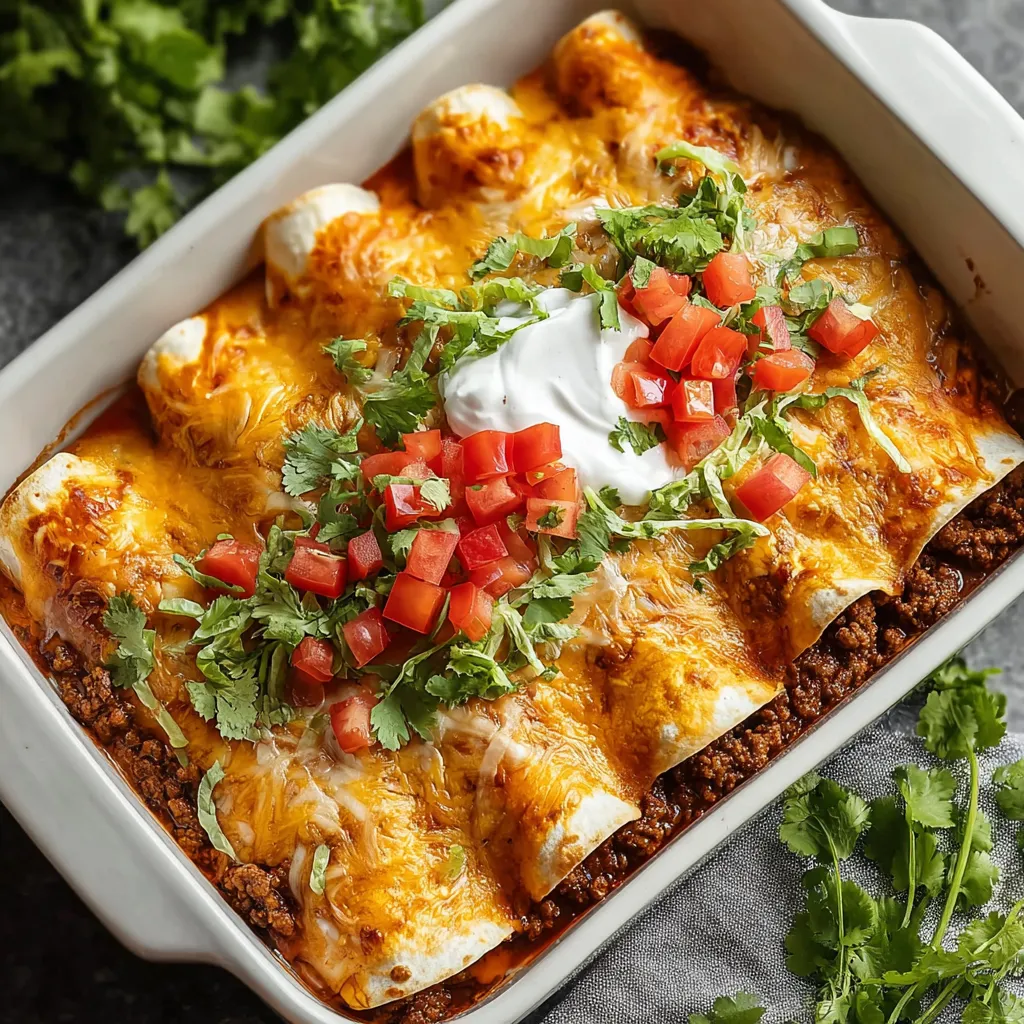
This hearty ground beef enchilada recipe has been my go-to dinner solution for years when I need something satisfying that the whole family loves. The combination of seasoned beef, zesty sauce, and melted cheese creates that perfect comfort food experience with a Mexican-inspired twist.
I first made these enchiladas during a particularly chaotic week when I needed something that could feed us for multiple meals. Now my family requests them almost weekly, and I love how I can prep the filling ahead of time to make dinner assembly a breeze.
Ingredients
- Lean ground beef creates the hearty protein base while keeping the dish from becoming too greasy
- Flour or corn tortillas both work wonderfully depending on your preference corn adds authenticity while flour is easier to roll
- Enchilada sauce provides that signature tangy flavor either store bought or homemade works beautifully
- Shredded cheese creates that irresistible melty layer use cheddar for sharpness or Monterey Jack for creaminess
- Onion adds essential sweetness and texture dice it finely for the best incorporation
- Garlic cloves bring aromatic depth freshly minced makes a noticeable difference
- Cumin provides earthy warmth essential for authentic Mexican flavor
- Chili powder contributes mild heat and rich color adjust to your spice preference
- Sour cream for topping adds cooling creaminess that balances the spices
Step-by-Step Instructions
- Preheat the Oven
- Set your oven to 375°F (190°C) to ensure it reaches the proper temperature while you prepare the enchiladas. This temperature allows for perfect cheese melting and slight crisping of the tortilla edges without drying out the filling.
- Brown the Meat Mixture
- In a large skillet over medium heat, cook the ground beef with the diced onions until the meat is no longer pink and the onions have become translucent, about 5-7 minutes. Break up the meat with a wooden spoon as it cooks for even browning. If your beef is not lean, drain excess fat after browning.
- Add Seasonings
- Stir in the minced garlic, cumin, and chili powder, cooking for another minute until fragrant. This brief cooking time allows the spices to bloom without burning the garlic, which would create bitterness.
- Assemble the Enchiladas
- Spoon approximately 2-3 tablespoons of the beef mixture onto each tortilla. Roll each tortilla tightly around the filling and place them seam-side down in a greased 9x13 baking dish. Arranging them this way prevents them from unraveling during baking.
- Add Sauce and Cheese
- Pour the enchilada sauce evenly over the rolled tortillas, making sure to cover all exposed surfaces to prevent drying. Sprinkle the shredded cheese generously over the top, creating a complete layer that will melt into a golden crust.
- Bake to Perfection
- Place the baking dish uncovered in the preheated oven and bake for 20-25 minutes until the cheese is completely melted, bubbly, and beginning to brown at the edges. The sauce should be visibly simmering around the edges of the dish.
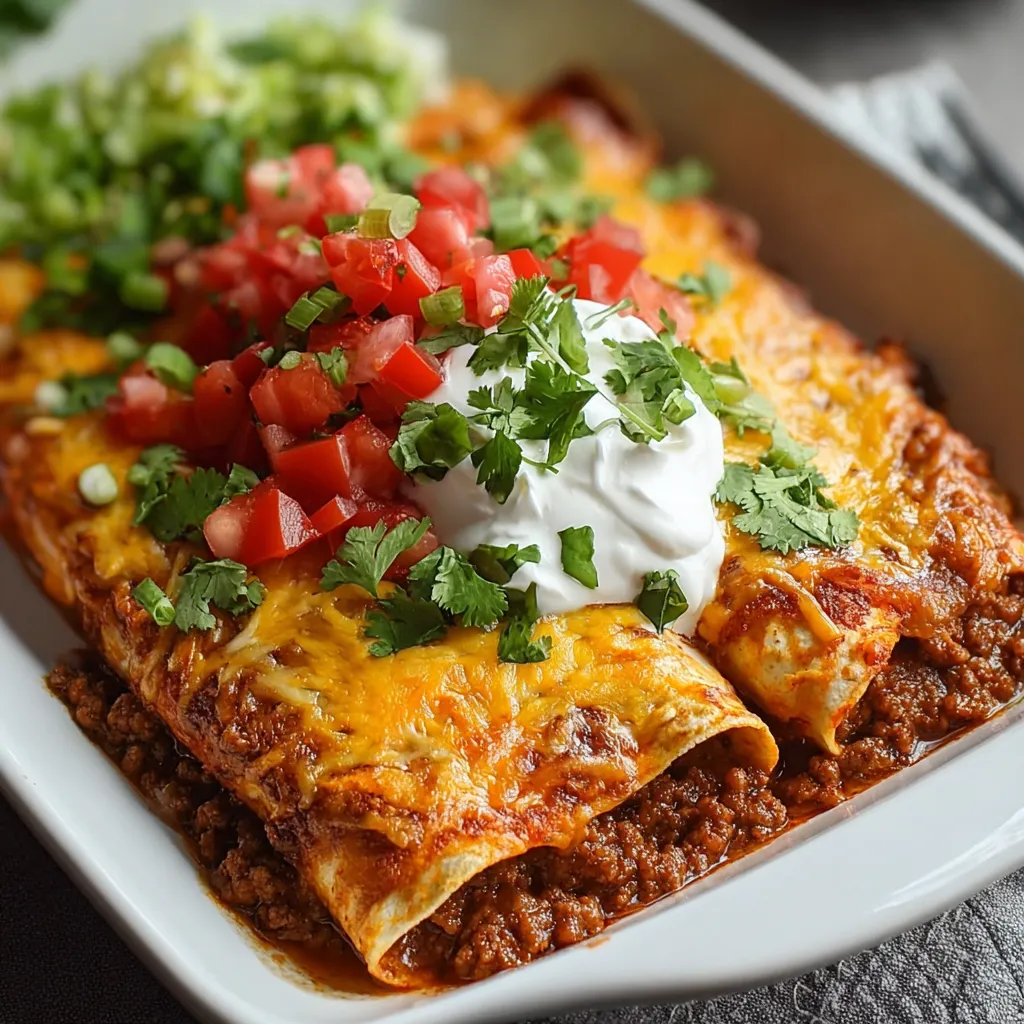
My favorite part about this recipe is how the enchilada sauce seeps into the tortillas, creating that perfect texture that's neither too dry nor too soggy. My daughter always asks for extra cheese on top, and I've learned that letting the enchiladas rest for about 5 minutes after baking makes them easier to serve without falling apart.
Make-Ahead Options
You can prepare the beef filling up to two days in advance and store it in the refrigerator. This actually allows the flavors to develop even more fully. When ready to use, simply reheat the filling slightly before assembling the enchiladas. You can also completely assemble the enchiladas, cover tightly with foil, and refrigerate for up to 24 hours before baking. Just add an extra 5-10 minutes to the baking time if cooking straight from the refrigerator.
Customization Ideas
The beauty of these enchiladas lies in their versatility. For added nutrition, mix in a cup of black beans or corn kernels to the beef filling. You can also layer in sautéed bell peppers or zucchini for extra vegetables. For those who enjoy heat, add diced jalapeños to the filling or serve with hot sauce on the side. Consider topping the finished enchiladas with sliced avocado, chopped cilantro, or a squeeze of lime juice for brightness.
Serving Suggestions
These enchiladas pair perfectly with Mexican rice and refried beans for a complete meal. A simple side salad with a lime vinaigrette adds freshness to balance the richness. For entertaining, set up a toppings bar with guacamole, pico de gallo, sliced black olives, and additional sour cream so guests can customize their plates. A pitcher of homemade horchata or margaritas completes the festive spread.
Common Recipe Questions
- → Can I use corn tortillas instead of flour?
Yes, you can definitely use corn tortillas instead of flour. Corn tortillas provide a more authentic Mexican flavor and are naturally gluten-free. For best results, briefly warm them before rolling to prevent cracking.
- → How can I make these enchiladas less spicy?
To make milder enchiladas, reduce or omit the chili powder and use a mild enchilada sauce. You can also add a tablespoon of sugar to the sauce to reduce heat while enhancing flavor.
- → Can I prepare these enchiladas ahead of time?
Absolutely! You can assemble the enchiladas up to 24 hours in advance and refrigerate them covered. When ready to serve, add the sauce and cheese, then bake for an additional 5-10 minutes to account for the chilled temperature.
- → What sides pair well with beef enchiladas?
Mexican rice, refried beans, and a simple green salad make excellent sides. For added freshness, serve with guacamole, pico de gallo, or a cilantro-lime slaw to balance the richness of the enchiladas.
- → How should I store and reheat leftover enchiladas?
Store leftovers in an airtight container in the refrigerator for up to 3 days. Reheat in a 350°F oven for 15-20 minutes until heated through. You can add a little extra sauce or cheese before reheating to prevent drying out.
- → Can I freeze these enchiladas?
Yes, these enchiladas freeze beautifully. Assemble them without baking, cover tightly with foil and freeze for up to 3 months. Thaw overnight in the refrigerator before baking, adding an extra 10-15 minutes to the baking time.